Posts

…Infinite Life Fitness Recipe: Double Chocolate Peanut Butter Cups…

peanutButterCups

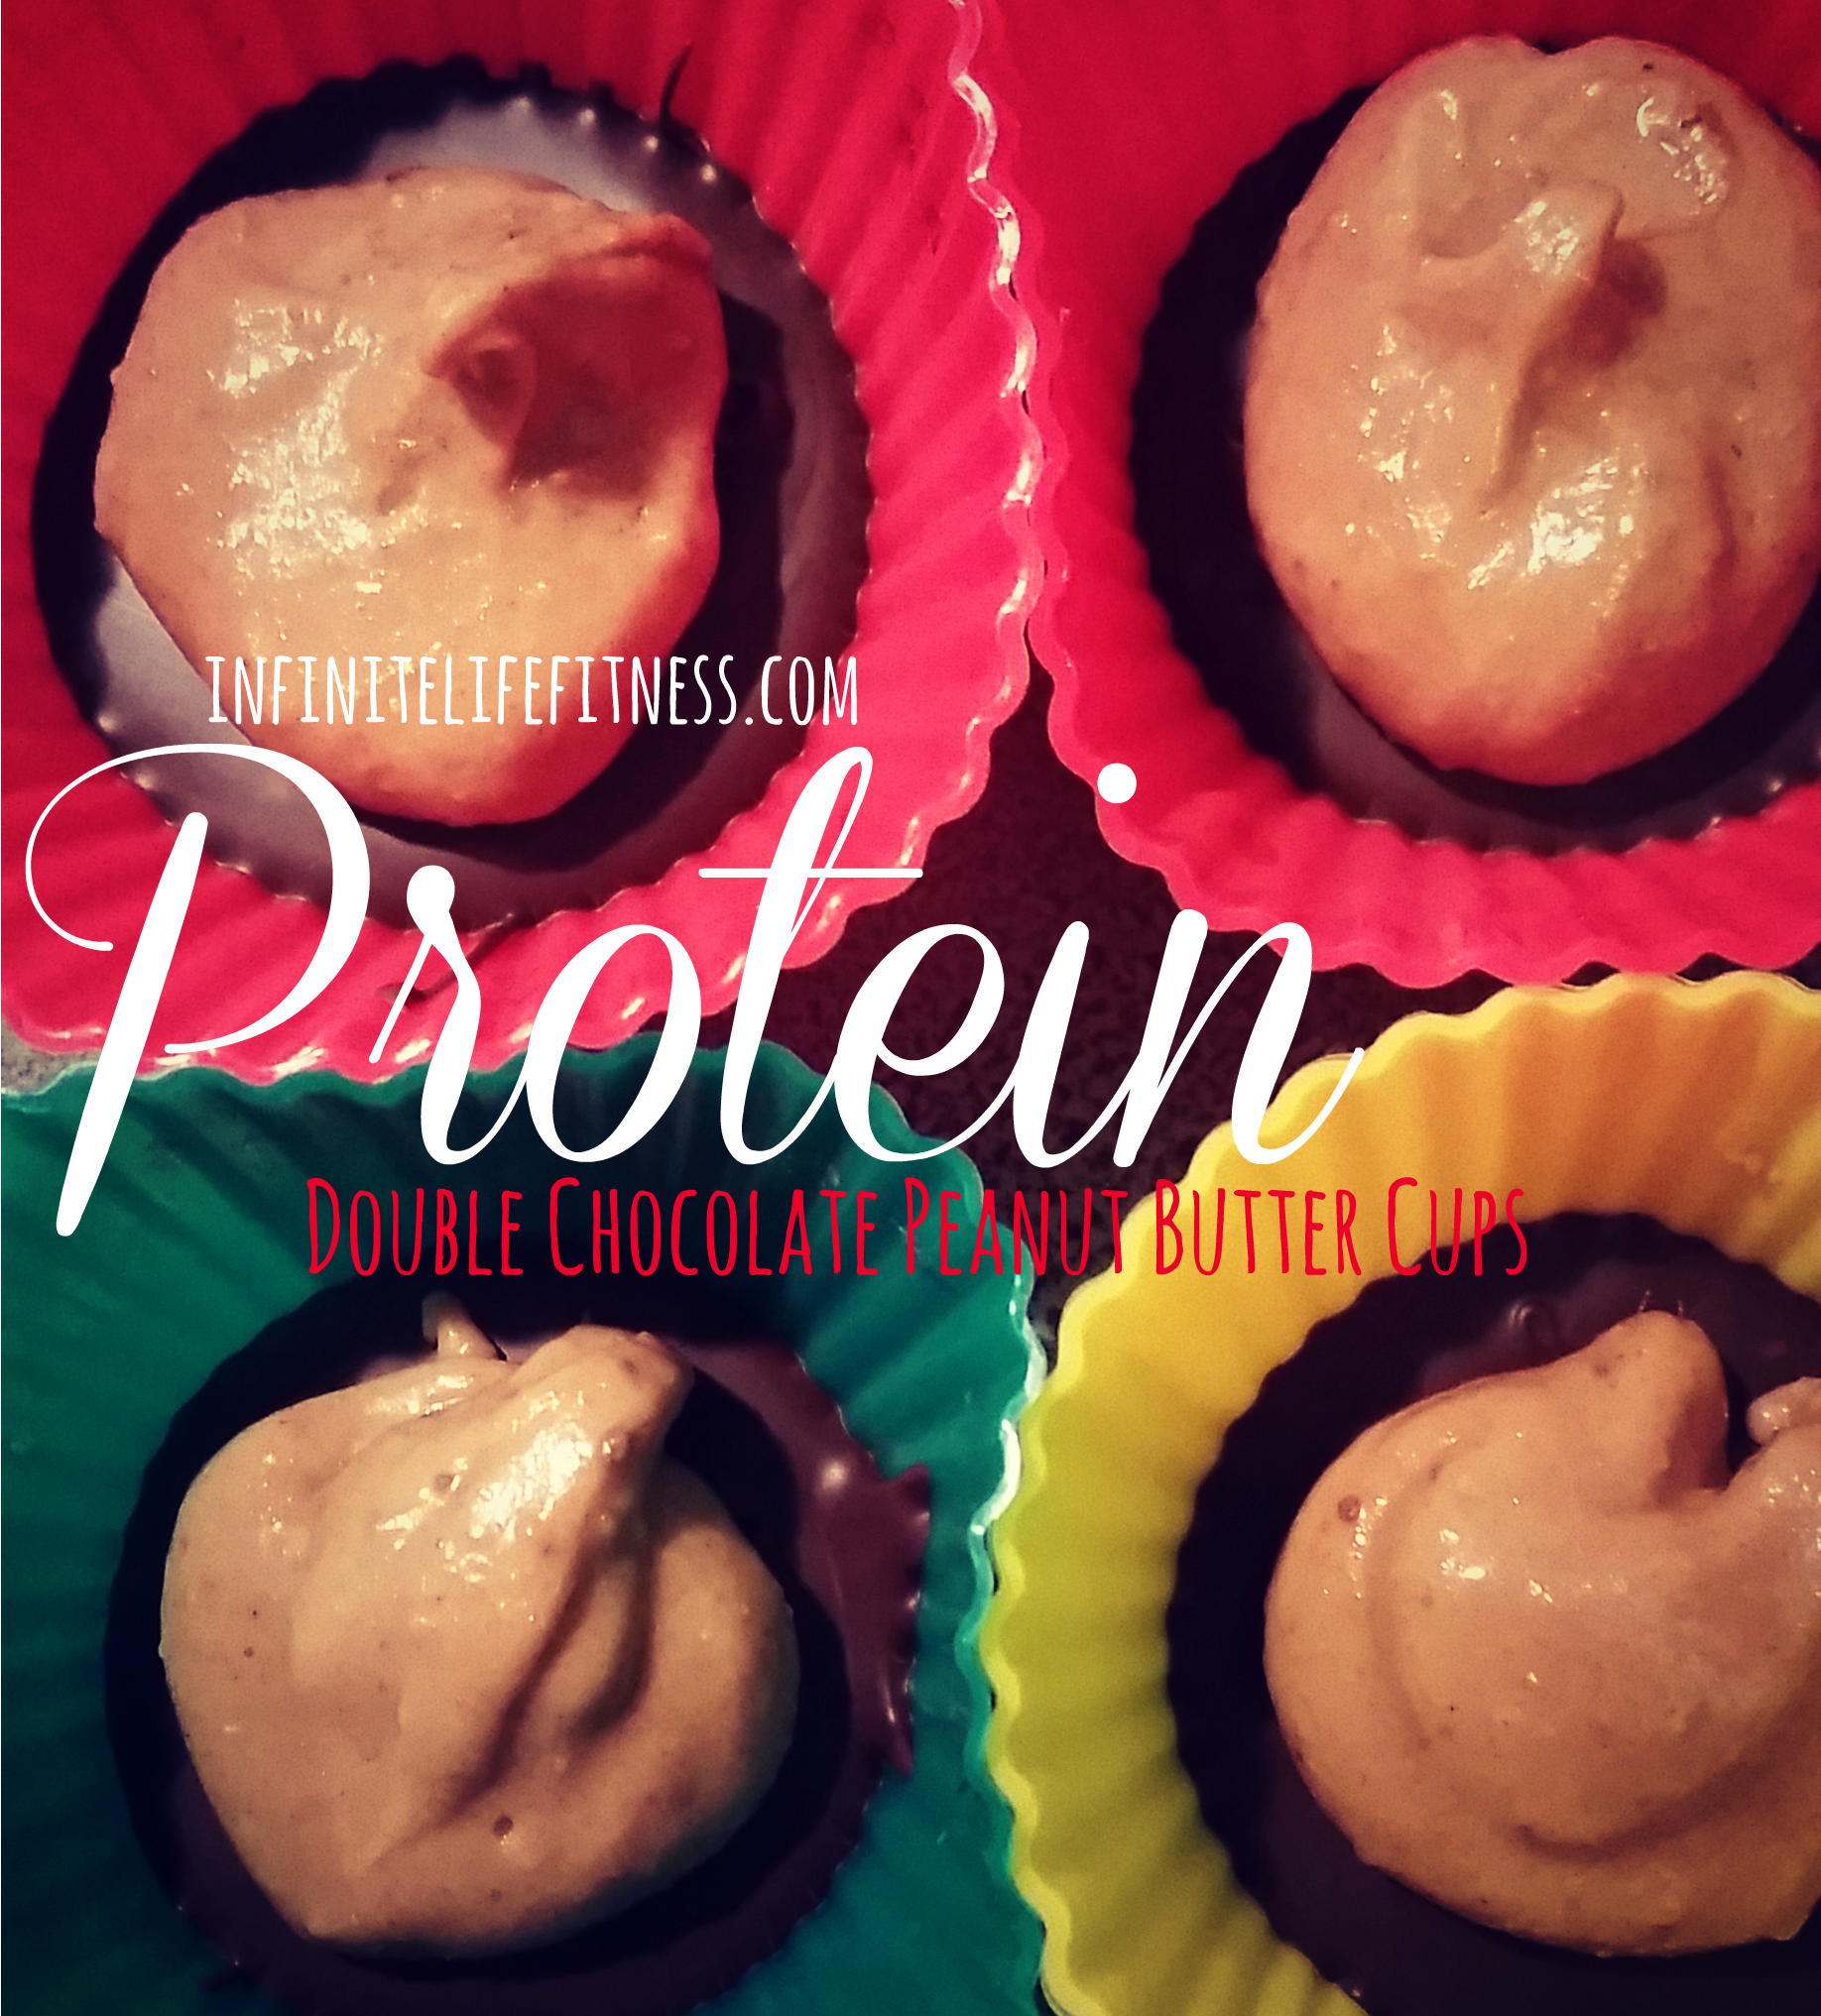
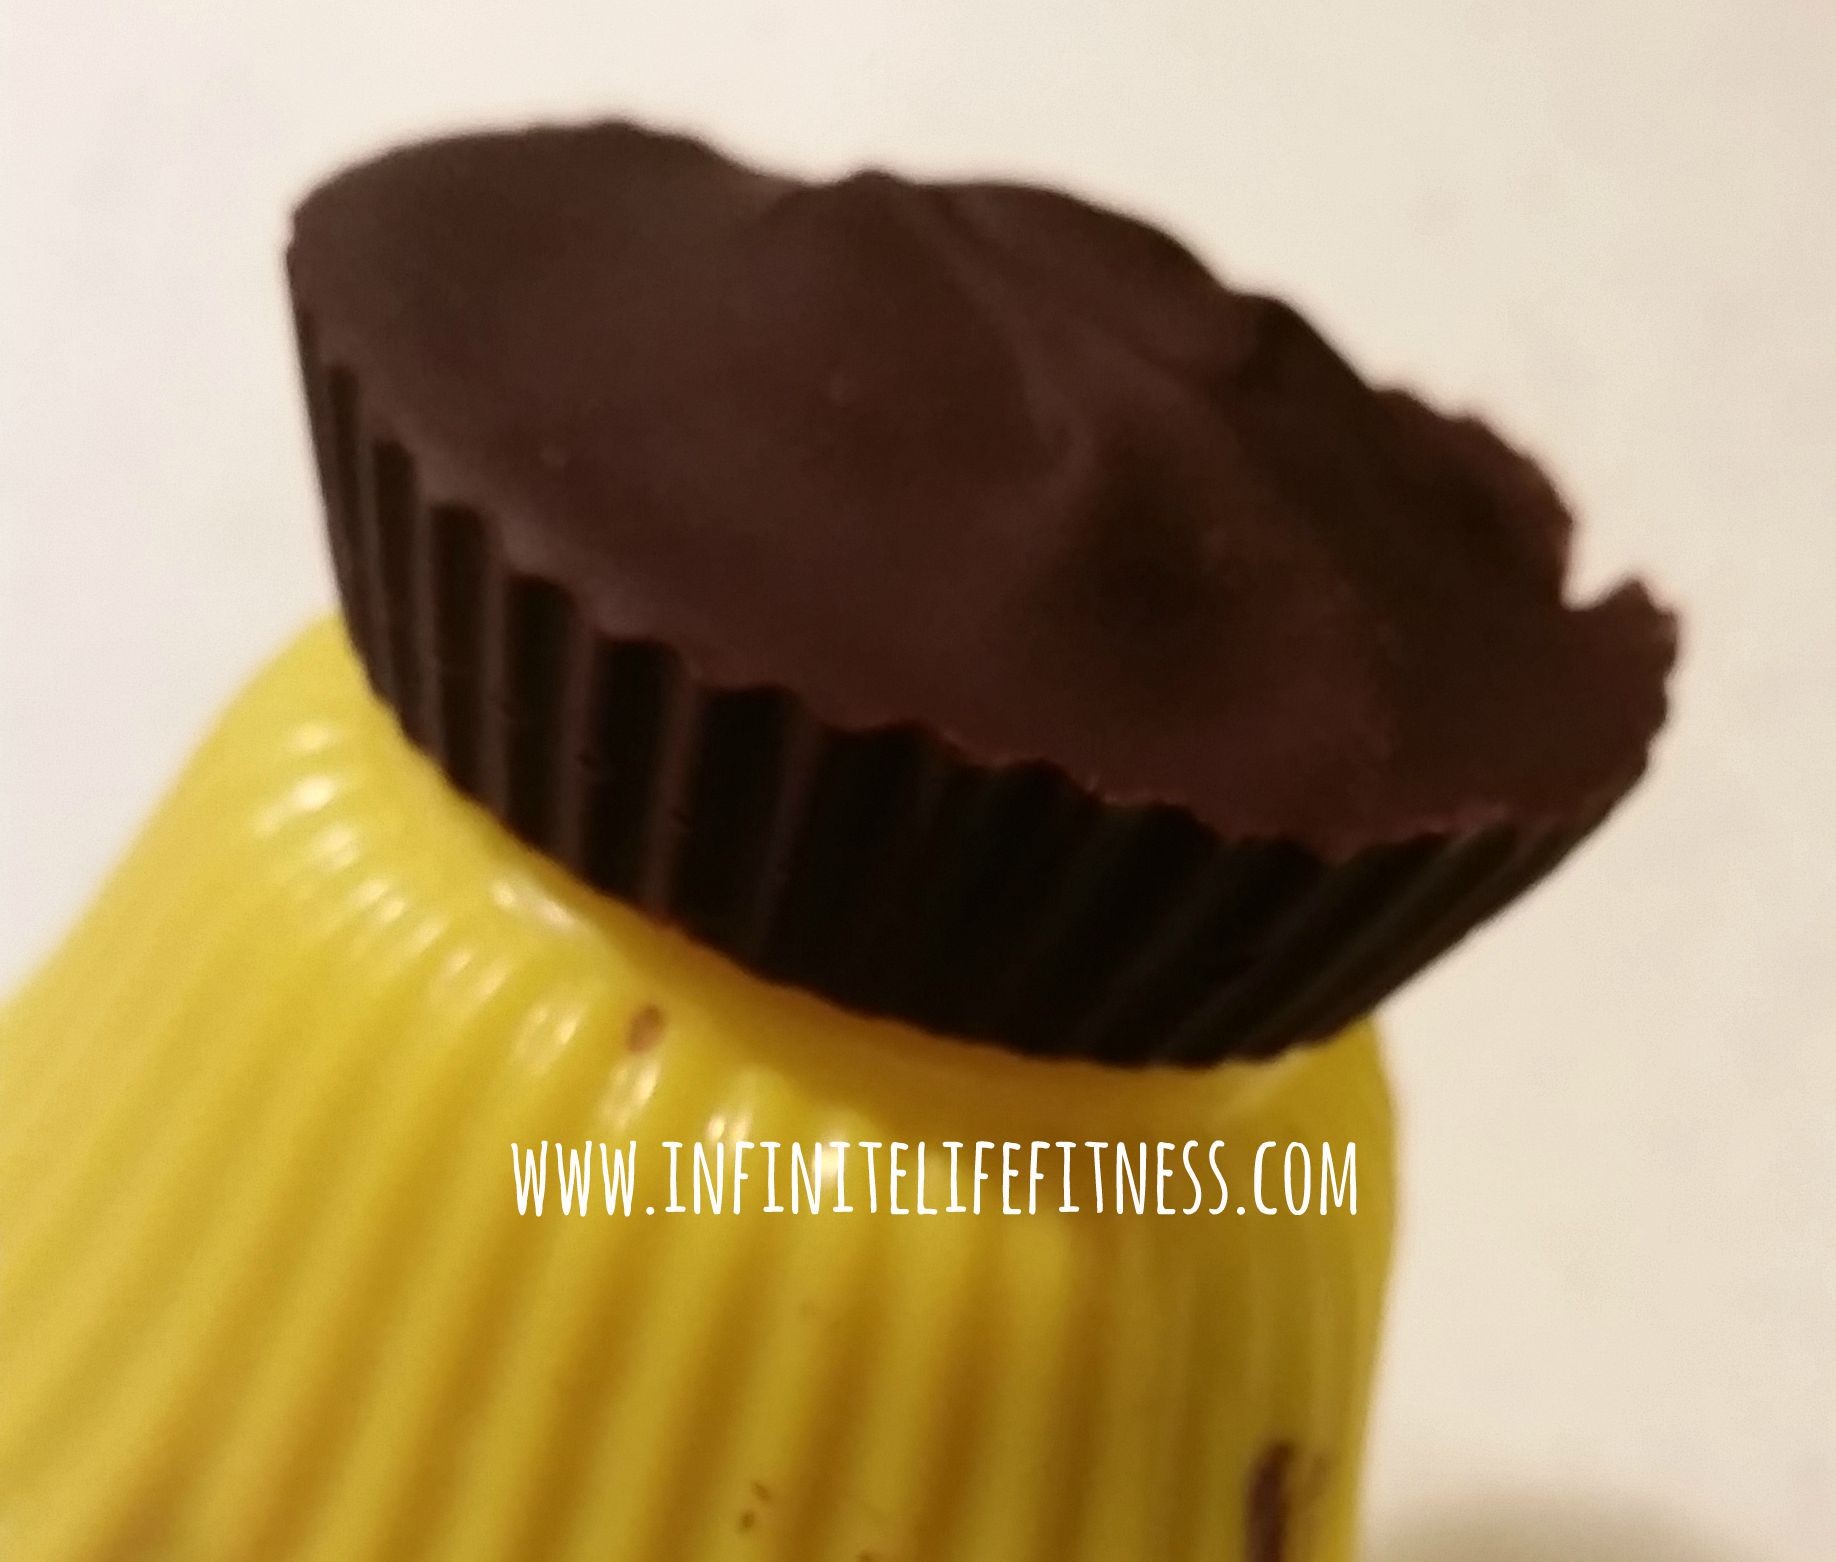
Ok… Lets be honest. Who can resist those delectable little…peanut butter filled… chocolate capsules of deliciousness!??

I know that I have a HUGE weakness for things that include both peanut butter and chocolate.  So I had to find a way to create my own recipe but carried a healthier nutritional profile.

Ingredients

1 cup chocolate chips (I used dark chocolate BUT I suggest other baking chocolate)

2 tbsp. vanilla protein

2 tbsp. peanut butter (I used natural creamy peanut butter)

1/4 cup chocolate PB2 (you can also use the regular peanut butter flavor PB2.  This is what makes these “double chocolate” protein cups)

1/4 cup unsweetened vanilla almond milk


Directions:

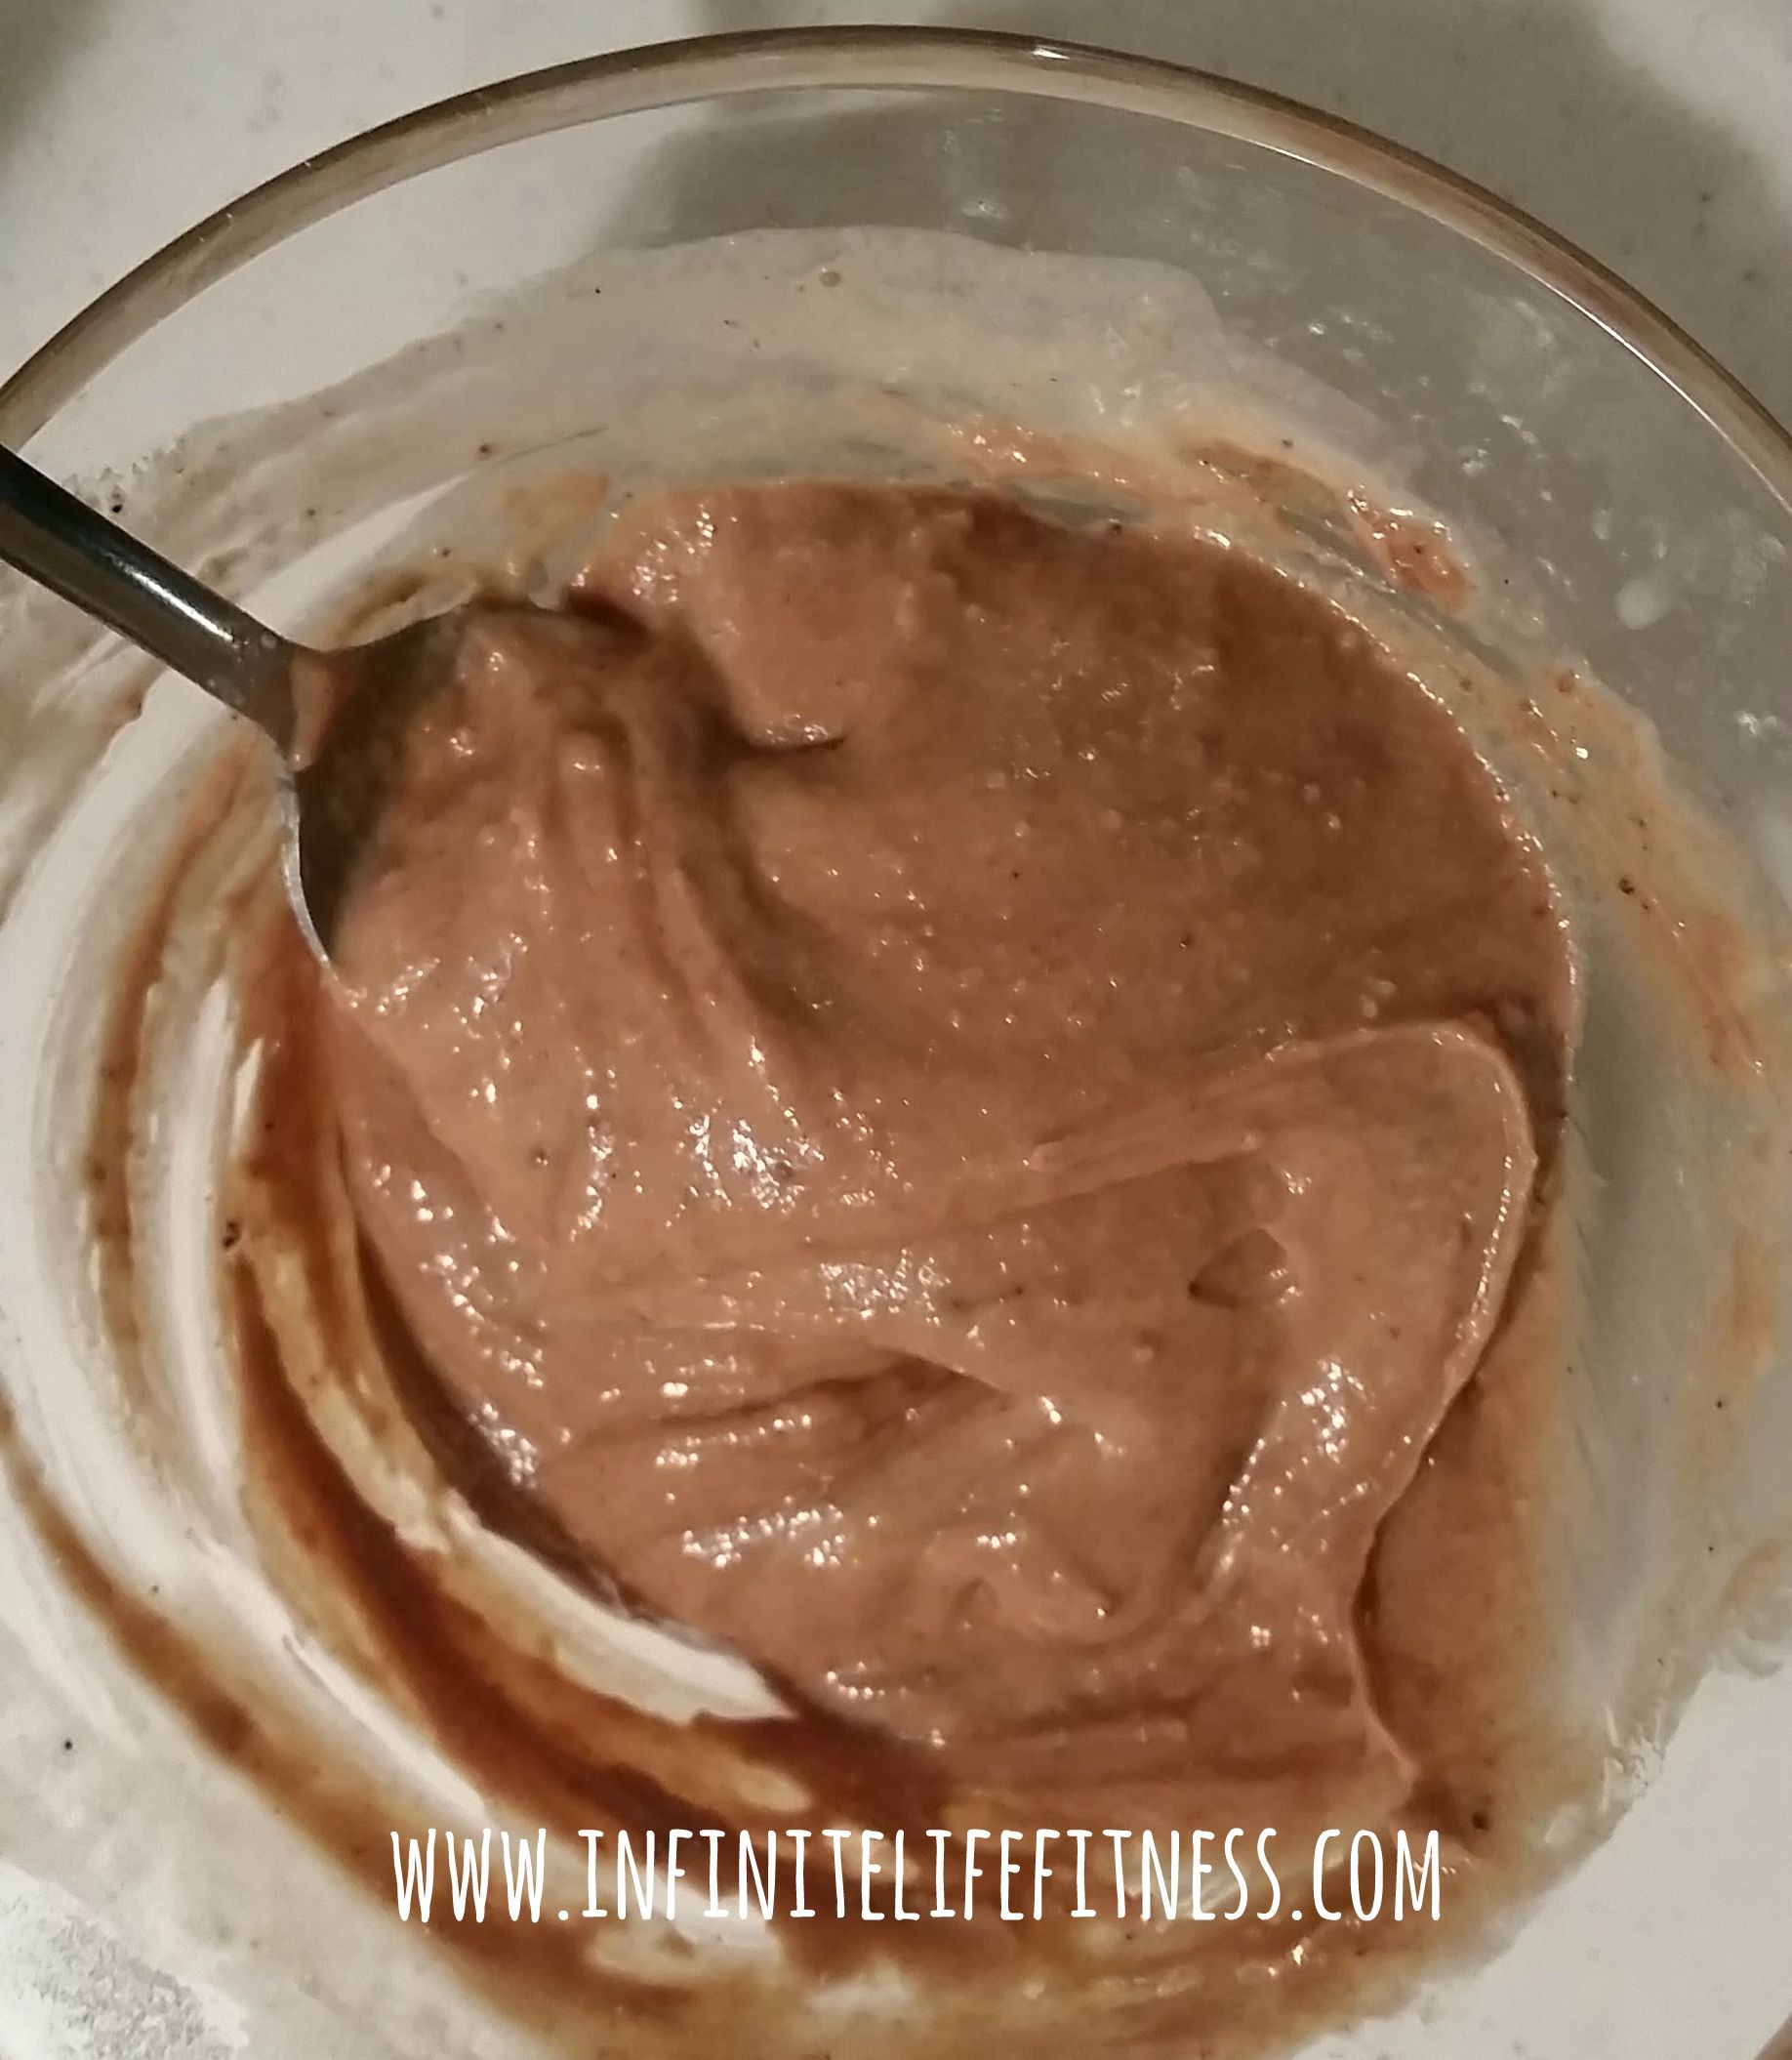
  • Combine protein powder and PB2 into a mixing bowl.
  • Add almond milk and mix contents until smooth and creamy.
  • Add peanut butter and mix until thick and creamy.

peanutButterCups_PBMixFinal

  • In a small sauce pan, melt the chocolate chips at low heat (stirring occasionally).
  • Add a small layer of melted chocolate to silicone baking cups (you can also use wax paper but silicon works best for this recipe). My layer is literally just enough to cover the bottom of the baking cup.  You do not want to add too much, just a few centimeters thick.
  • Place baking cups with chocolate into the freezer until hardened (this will take about 15 -20 minutes. Make sure they are sitting on a flat and even surface while in the freezer)
  • Take the baking cups out of freezer and add about 1/2-1 tbsp of peanut butter mixture into the chocolate cup. (DO NOT overfill the cup! Just enough for a small dollop of peanut butter protein mixture to sit in the middle of the cup)
  • Cover the peanut butter protein mixture with more melted chocolate. ( I add enough chocolate so that the peanut butter mixture is “hidden”.

peanutButterCupsSteps

  • Place chocolate cups (with the added peanut butter protein mixture) to the freezer until hardened. (This will take about 30 – 45 minutes).
  • Remove chocolate cups from silicone baking cup (or you can leave them in the wax baking cups if you chose to use those) AND ENJOY!

peanutButterCups_Final

  • Keep these stored in the freezer until you are ready to eat them. I typically place the cups in a Tupperware container to help store them in the freezer.


Nutrients:

This recipe will make approximately 12 cups
Serving Size: 1 Peanut Butter Cup
Calories: 120
Fat: 8 g
Protein: 7 g
Carbs: 8 g
Sugar: 5 g

Try these healthier peanut butter cup alternatives and let me know how you like them! Like stated above, you will want to keep them in the freezer until you are ready to eat them.  This will also allow them to last longer.

These are a great treat for you, your family, or even for your friends! I made these and took these to work and NO ONE was able to tell that they were not the “regular” peanut butter cups. You can get creative and add things to your cups. I prefer dark chocolate so that is what I decided to use instead of milk chocolate.  It is your treat so make it however you like!

…infinite life fitness recipe: Protein Fudge…

protein_fudge

Working towards your health and fitness goals do not require you to completely sacrifice sweet treats.  Lets be honest…who doesn’t get a sweet tooth every now and then? And yes it can be hard to ignore those sweet cravings! So what do you do?

Instead of driving yourself crazy and trying to ignore the sweet cravings you should come up with healthy AND tasty alternatives for you have when you are needing something a little sweet.  Here is a treat that I personally love to make and usually keep in my freezer just in case I need to grab something sweet.

What you will need:

  • ¾ cup peanut butter (I use Skippy natural chocolate peanut butter)
  • 1 tbsp honey
  • ¼ cup melted coconut oil
  • 3 scoops vanilla protein powder ( I chose to use 1st Phorm Vanilla Whey. Depending on the brand of protein you may need to use less or more! You will have to adjust your recipe)

What you will do:

  • heat up coconut oil and measure out 1/4 cup
  • Place all of the above ingredients into a mixing bowl
  • mix ingredients until batter is thick and sticky (I added small amounts of almond milk to get the mixture to mix and blend. I literally just added a few tablespoons)
  • Once the batter is mixed place in a freezer safe container
  • spread batter evenly into container
  • place container in freezer and allow to freeze
  • once the batter is frozen cut into even squares and enjoy!

NOTE: I stored my protein fudge in the freezer.  If thawed out it will just become runny and not thick.  Keeping it in the freezer allows it to stay in the fudge chunks.  Even though it is frozen, the fudge is very easy to bite into and chew.  It is slightly chewy and VERY yummy!

You can get creative and toss in nuts, chocolate chips, or anything else that you would like.  But remember, adding those things increase the calorie, carbs, and fat macro nutrient content in this treat.  So you want to try to limit what you add to make sure to keep it as healthy as possible.

Like I stated before, this is a great treat to keep around the house to help subdue those sweet cravings you may get. This snack is packed with an amazing taste and is high in protein.

Mix. Freeze. and Enjoy! Let me know how YOUR version of this recipe turns out!


…Infinite Life Fitness Recipe: Protein Bread…

protein bread


If any of you are like me…you may LOVE to eat bread and bread like products.  Bread is my one weakness so once you find out the nutritional value (or the lack of nutrition) that is found in your favorite bread, it makes you cringe just thinking about indulging in more than one service size.   I had to find an alternative to help satisfy my bread craving as well as fit into my macronutrients.

What you will need:

  • 1 pack of baking bread yeast (NOT the quick rise yeast, just the regular yeast)
  • 2 cups of wheat flour
  • 1 cup (84 g) of vanilla Protein (I used 1st Phorms Vanilla Ice Cream Protein.  You can use other brands but i have found this brand to work the best for me when it comes to baking and cooking with it)
  • 1 tablespoon of wheat gluten
  • 1 tablespoon of dry milk
  • dash of salt
  • 1 tablespoon of olive oil
  • 1 tablespoon of honey (you can also use maple syrup, agave nectar, or sugar.  YOU NEED regular sugar to help feed the yeast.  It is NOT advised that you use artificial sweetener for this recipe)
  • 1 1/2 cup of water
  • Bread making machine or bread pan

What you will do:

  • the type of bread machine that I have and use  is an Oyster 2lb express bread maker 
  • Add all of the wet ingredients first!!
  • You will then add together all of the dry ingredients
  • You will make a small well in the middle of the mixture and then add the yeast (look at picture 1)proteinbread_1
  • For my settings i chose: 1.5 lb loaf & light crust.
  • I pressed the start button and just let it sit!
  • My bread maker kneaded the dough and baked it.  Once the bread was ready the machine cut off automatically.
  • I let the bread cool and then removed it from the pan and cut it up into my desired sizes.

You are more than welcome to play around with this recipe.  This is just how i learned how to make mine and it seems to work very well.  My bread is very dense yet flaky.  It is very filling for me and a great snack to grab when you are on the go!

proteinbread_2


…Infinite Life Fitness Recipe: Flourless Protein Peanut Butter Cookies…

Here is another healthier indulgence!

I have found that it is very easy for me to stick with my diet plan…if  i know that i can treat myself randomly with a HEALTHIER version of some of my favorite treats

Today i am going to share with you how I made flourless peanut butter protein cookies!

FIRST: I MADE MY OWN PEANUT BUTTER!!! 

Yes i made my own pure peanut butter

This was done by:

~1 1/4 cup UNSALTED Raw Peanuts

~1 Tablespoon Canola Oil

I got my BLENDER  and put in 1 1/4 cup of peanuts.  I then put in the 1 Tablespoon of canola oil.

THIS WAS THE TRICKY PART….I had to play around with the settings on my blender to get it to start to turn to “butter”

  • at first I chopped up the peanuts (there was a “chop” option on my blender)
  • I then “Whipped” the peanuts (with the “whip” option on my blender)
  • This took a little time because I would Whip the peanuts for about 15-20 seconds and then have to take the lid off and mix the peanut chunks up with the whipped butter that was developing on the bottom of the canister.  This was the part that took the longest (about 10 minutes)

After the peanut butter was the consistency of peanut butter I added ANOTHER 1/4 cup of the raw peanuts (I LOVE crunchy peanut butter….if you do not want crunchy peanut butter than I would just add 1 1/2 cups of peanuts when you first start!) I just blended this for another 15-20 seconds just to chop up the new big peanuts and to get it mixed in with the butter


Directions for making the cookies:

I wanted to try to make peanut butter for these cookies to use up some peanuts that I had gotten and needed to use. so you can use store-bought NATURAL peanut butter (look on the back of the label at the store! The only ingredients should be peanuts and salt and possibly oil)

Ingredients:

  • 1/2 cup Natural peanut butter
  • 1/4 cup Protein Powder (I used a chocolate peanut butter protein powder I picked up from Wal-Mart)
  • 1/4 cup liquid egg whites (or seperate the egg whites from 4 regular eggs)
  • 1 teaspoon baking soda

Directions:

  • Heat your over to 220 degrees
  • mix all of the ingredients into a bowl
  • I used a table-spoon measuring spoon and scooped out table-spoon size balls and placed them on a cookie sheet

I let the peanut balls cook for about 10 minutes.  i took them out and then flattened them with a fork (to give them “texture” on top and to allow them to “flatten” like regular cookies.  You can leave them as balls but it may take a little more time for them to cook.

I put them back into the over and let them cook for another 10 minutes (until they turned slightly browner in the over)

I took them out and let them cool off for about 10 minutes.

and Whhhaaa-Laaaaa! You have HEALTHIER peanut butter cookies!

Nutritional Information:

My batch made 10 cookies!  I made the batter and split it up in tablespoon size cookies.  You can make yours smaller/bigger but you will have to recalculate this information if you make them a different size!

Nutrition Per Cookie (made 10)

  • Calories: 145
  • Total Fat: 11 grams
  • Sodium: 20 grams
  • Carbs: 5 grams
  • Sugars: 1 gram
  • Protein: 9 grams

Nutrition for the WHOLE batch:

  • Calories: 1454
  • Total Fat: 111 grams
  • Sodium: 198 grams
  • Carbs: 54 grams
  • Sugars: 11 grams
  • Protein: 85 grams

IF you try these out please let me know how they turned out!! I would love to know!
I hope that you guys enjoy these HEALTHIER forms of treats that you can hopefully start to incorporate into your life!

For more meal options, suggestions, recipes, or other food tips please feel free to follow me on Instagram as I upload things daily!